It’s important to use well-made butter puff pastry for the base of your apple tart. If you intend to make it yourself, take a look at our puff pastry recipe; otherwise, you can order some from your nearest bakery or pâtisserie. Puff pastry freezes well, so you can make a batch in advance and have it at hand for whenever the mood strikes. Just defrost it overnight in the refrigerator before using.
Step 1: Roll your pastry
If you’re buying ready-made, a block of pastry is preferable to ready-rolled sheets, so you have control over the thickness. Good puff pastry rises more than supermarket varieties, so the base needs to be rolled quite thinly – about 3mm-4mm should give you more than enough puffing. Once it’s rolled out, you’ll need to work quite quickly. You don’t want the butter in the pastry to melt; pop it into the refrigerator it if it gets too soft. You can also dust it with flour to prevent it sticking while you work – just brush off any excess so it doesn’t make the pastry tough.

Step 1.
Step 2: Cut out the pastry
Once you’ve rolled the pastry to the desired thickness, lift it away from the bench and rotate it a couple of times before cutting it out. This relaxes the pastry. If you cut out your round before doing this, the pastry will spring back once it’s cut and you’ll end up with an irregular shape.
The beauty of this tart is that you can make it any size you like. Here, we’ve used an upturned bowl as a template to measure a large round.

Step 2
Step 3: Sprinkle finely chopped almonds onto the pastry
We’ve added a sprinkling of finely chopped almonds between the pastry and the apple layers – this isn’t traditional, but it helps absorb excess moisture from the apples and doesn’t hurt the taste and texture. You could also use almond meal to the same effect.

Step 3
Step 4: Prepare your apples quickly
Work quickly with the apples, too, so they don’t discolour. You can rub them with a little lemon juice as you go, but too much and the apple will break down during cooking. Of course, it’s best to use fresh, blemish-free fruit – gala or Fuji are ideal.
Step 5: Use a mandolin to slice your apples
A mandolin is the best way to achieve thin, even apple slices quickly. Once you’ve peeled and cored the apples, slice them horizontally to produce fine rounds.

Step 5
Step 6: Arrange the apple slices
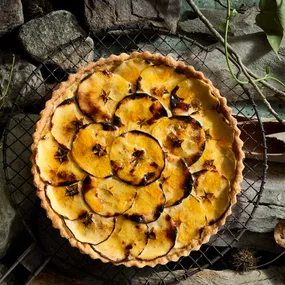
Taking a bit of time to arrange your apple slices carefully pays dividends with the look of the finished tart. Working from the outside in, arrange the slices, in the order they were cut, in a ring, overlapping closely. Work your way towards the centre, creating concentric rings, each slightly overlapping the one before it, until the base is completely covered.

Step 6
Step 7: Brush the apples with melted butter
Finally, brush the apple slices with melted butter to coat, then dust it evenly with caster sugar. The fine grains will stick to the butter and melt quickly, caramelising and colouring the tart. Or you can refrigerate the tart after buttering until you’re ready to bake it, making it the perfect prepare-ahead dessert for a dinner party. The melted butter helps to prevent the apples from oxidising in the refrigerator. Just dust it with sugar once you’ve removed it from the refrigerator (and keep in mind that if the tart has been chilled thoroughly, it’ll need a little extra cooking time).

Step 7
Step 8: Bake the tart
Puff pastry should be baked at a high heat so that the layers separate and become crisp and puffed. A flat, heavy-duty oven tray or baking sheet keeps the tart flat. It’ll also absorb more heat than other oven trays so it’s more likely to produce a crisp base.
In the event that your pastry is well cooked but your apples aren’t as golden as you’d like, don’t despair – simply sieve a little icing sugar over them and use the grill element of your oven or a blow-torch to caramelise them. Keep a watchful eye, though: the sugar can burn quickly. This handsome tart can be eaten at room temperature, but is at its finest served straight from the oven with a scoop of vanilla ice-cream.

