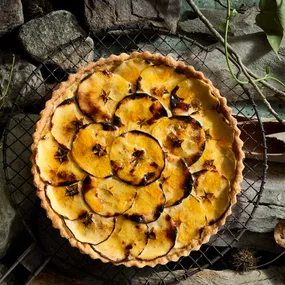
Apple pie is one of those desserts just about everyone enjoys. Making it at home really comes down to getting the basics right. Starting with the two components that make a really great apple pie: the filling, made with fresh seasonal apples (I like a mix of tart and sweet), and of course the pastry.
In my recipe, I’ve given two types of pastry. The first, a flaky pastry, is along the lines of an American pie style, and the second, sweet pastry, is more typically Australian.
Apple pie recipe
Ingredients
Method
Cut apple into 1.5cm-thick slices into a large saucepan.
Add sugars, lemon rind and juice, cinnamon and a pinch of salt and stir to combine. Cover with a lid and cook over medium heat, stirring occasionally, until apples are tender but retain their shape (10-20 minutes). Set aside to cool, then strain.
For pastry, pulse butter, flour and sugar in a food processor until butter is the size of peas. Remove half the mixture and continue to pulse until coarse crumbs form. Return half-processed mixture and pulse 2 or 3 times just to combine.
Whisk yolk and 40ml iced water together in a small bowl to combine, then add to the flour mixture, pulsing just until the mix holds when pressed between two fingers.
Turn dough out onto a bench and bring together with the heel of your hand. Divide in half, flatten each into a 12cm disc, wrap in plastic wrap and refrigerate to rest (2 hours).
Preheat oven to 220C. Stand pastry at room temperature for 10 minutes, then place one disc between 2 sheets of Go-Between and roll to a 30cm round, then refrigerate. Roll remaining disc to a 26cm round, then refrigerate.
Line a 22.5cm, 3cm-deep pyrex pie dish with 30cm round of pastry and refrigerate (10 minutes). Fill the dish with apple filling, then gently lift the pastry lid on top.
Trim the pastry to a little beyond the rim of the dish, then press and crimp the edges together.
Whisk eggwhite, brush the pie top with it, sprinkle with sugar and cut a few 5cm slits in the top.
Transfer pie to oven, reduce the temperature to 200C and bake for 10 minutes, then reduce the temperature to 185C and continue to bake, rotating the dish halfway through cooking, until pie is deep golden brown (40-50 minutes). Set aside to cool a little before serving.
For flaky pastry, pulse flour, lard, sugar and a pinch of salt until mixture resembles coarse crumbs. Add butter and pulse until butter is the size of peas. Add 90gm-100gm iced water and pulse until mix comes together when pressed with fingers; you may need to add a little extra water if the pastry seems dry. Continue from step 5.
Notes
The pastry body
The sweet pastry is short and crumbly thanks to its a high fat and sugar content, and the addition of egg yolk makes it softer. The flaky pastry, meanwhile, is made with lard, which creates the flakiness; less sugar and no egg makes for a crisper finish to your apple pie.
When it comes to mixing the dough, it’s important to chill the butter in the freezer once it has been diced so it can be pulsed through the flour without getting too warm and melting. I also use iced water to keep the dough cool, and I like to use a food processor because it does the job quicker and more evenly. Incorporating some of the fat more thoroughly with the flour helps to create a pastry that’s more water-tight, reducing the amount of moisture seeping into the pastry and so preventing sogginess, while the larger pieces of fat create the crumbly or flaky quality, depending which type you’re making.
Add just enough water to start bringing the pastry together; a good test is to pinch some dough between your fingers – it should just hold together. At this point I turn the mix out onto the bench and smear it together using the heel of my hand, then I divide the dough in half, form each into a disc of around 12cm diameter and rest them in the fridge wrapped in plastic wrap.
The filling
I’ve kept the pie filling simple to celebrate the flavours of the apples; I use a mix of tart Granny Smith and sweet apples, such as royal gala, pink lady or sundowner, with the simple flavourings of cinnamon, lemon and sugar. The apples need to be boiled – not vigorously, but enough so their pectin is made heat stable, which helps to hold the juices and filling together when the pie cools. Cook the apples until they’re just tender.
In all you need roughly eight cups of cooled filling to make a nice deep pie in a 22.5cm x 3cm deep Pyrex dish.
The pastry lid
I roll the pastry between sheets of Go-Between freezer film to stop it sticking to the bench; it also helps when you lift the pastry into the pie dish. Occasionally you’ll need to peel the sheets away from either side to let the pastry loosen as you roll.
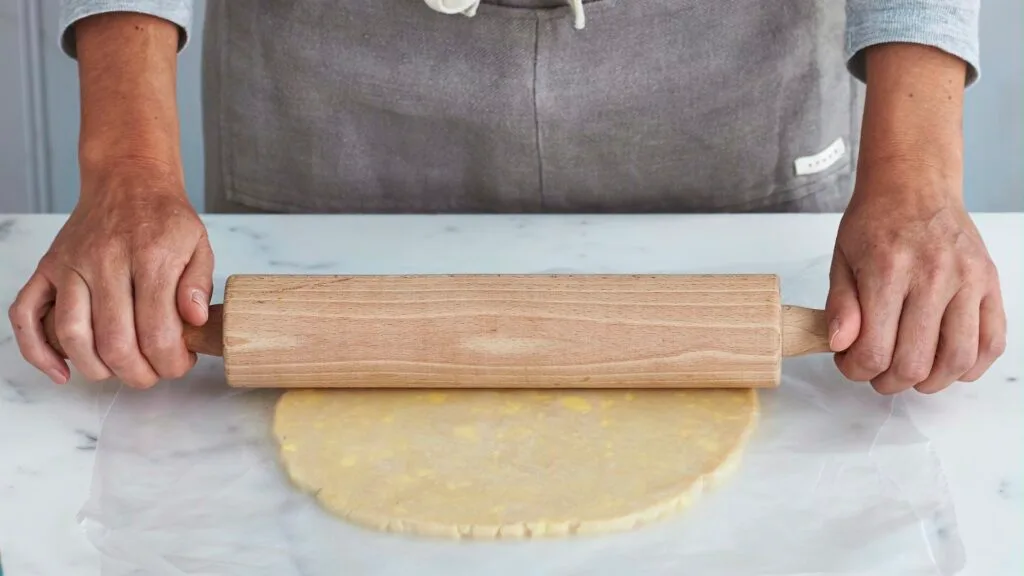
Step 6: Roll the pastry between two sheets of Go-Between to stop it sticking to the bench.
To line the pie dish, roll the first round to 30cm, then invert it into the dish, remove the Go-Between, and use a pastry brush to lightly press the pastry into the sides of the dish. Flatten the edges slightly so the lid fits neatly on top, but try to handle the pastry as little as possible so it stays cool. Don’t trim it at this stage, but refrigerate it while you roll the other half to a 26cm round for the top, and rest that in the fridge, too – this rests the gluten and firms up the pastry a little to make it easier to work with.
When the filling is cool, spread it evenly in the pastry case, then place the second pastry round on top. I use kitchen scissors to trim the edges of both pastry layers to about 1cm beyond the rim of the pie dish, pressing the edges together gently to seal.
At this point you can crimp the edges of the pastry if you like.
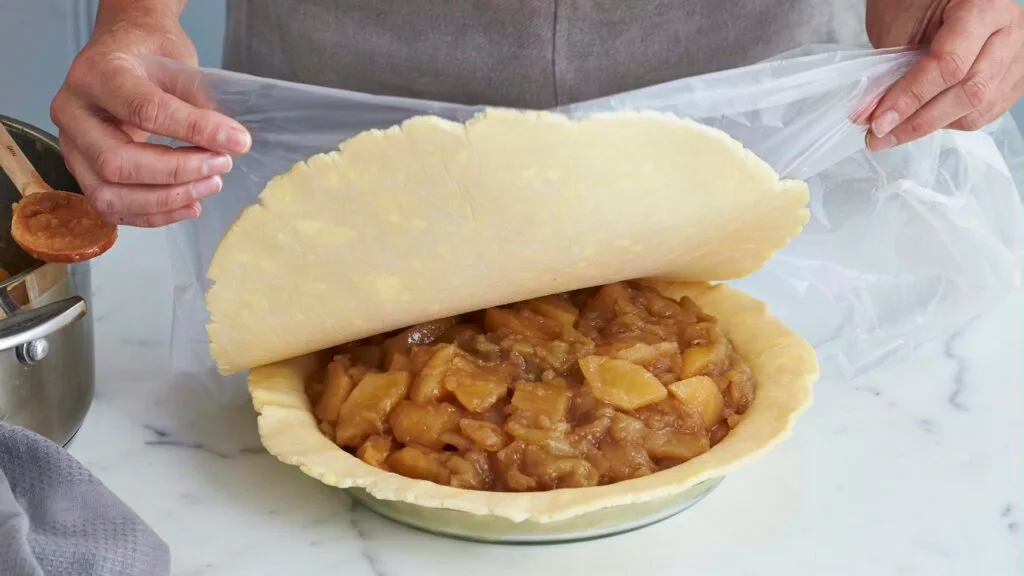
Step 7: Gently lift the pastry lid onto the pie.
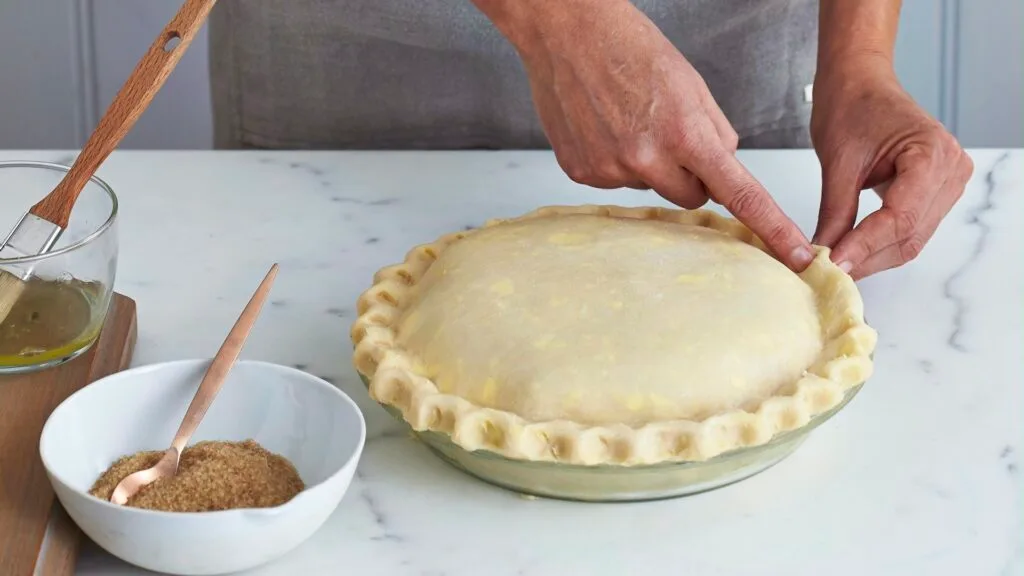
Step 8: Trim the pastry lid, then press and crimp the edges together.
The baking process
Because the apple pie takes a while to bake, I use eggwhite for the glaze, because it doesn’t colour as readily as the usual egg yolk and milk or cream. The glaze also gives the sugar something to stick to – I use demerara for its flavour and texture; also, because it doesn’t dissolve, it makes a nice finish. Cut five short slits in the top of the pie to let the steam escape and the filling thicken; this also helps prevent excess moisture seeping into the pastry.
The oven needs to be hot so the pastry sets faster, trapping the fat as it melts and creating the flaky and crumbly textures (and helping stop too much moisture soaking into the pastry. If you’re using a tin dish, preheat a tray in the oven; if you’re using a Pyrex dish – which I prefer because it conducts the heat slowly and evenly and nicely colours and crisps the pastry – place it on a cool baking tray and then into the oven to avoid thermal shock. A tray also catches any filling that bubbles out. Bake the pie on the bottom rung, so the top doesn’t brown too quickly.
Once it’s cooked, stand the pie to give the pectin time to set a little, then serve it with your favourite accompaniment – I’ll be having mine with a little whipped cream.
Want more recipes for apple pies?
