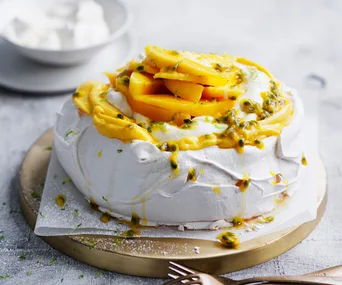
Sydney’s Flour and Stone is a small-batch kind of bakery, but Nadine Ingram says she’s still made thousands of pavlovas. “We’re after a crisp shell with a marshmallow centre,” she says. “I make the pavlovas at the end of the day, then the oven gets turned off and they sit in it overnight to set.”
Ingram also cautions against overwhipping or adding the sugar too quickly, which can result in fissures. “Starting at medium speed will ensure the pavlova isn’t too aerated (yes, it’s a thing), and have more cracks than you’re after,” she says, but it’s a question of balance.” As Stephanie Alexander says, ‘a pavlova should be suitably cracked’.”
THE EQUIPMENT YOU’LL NEED
A carbon-steel tray holds heat and cooks the base of a pav evenly.
Silicone (non-stick) baking paper
Ingram uses an offset palette knife for shaping and smoothing. “I love them so much,” she says. “I’ve even been known to carry one in my handbag.”
A non-stick rubber spatula will remove every bit of meringue from the bowl.
A stand mixer has the best whipping power, and it’s hard to go past the KitchenAid Artisan stand mixer ($749).

The tools you require for optimal pavlova-making.
(Photo: Andrew Finlayson)HOW TO MAKE THE PERFECT PAVLOVA, STEP BY STEP
1 Ingram weighs out 250 gm of eggwhites, which is about seven eggs’ worth. Make sure there’s no yolk in the whites, then transfer them to a clean, dry electric mixer. Ingram adds a pinch of salt at this point. Whites at room temperature will foam more rapidly than those straight out of the fridge.
2 Whisk on medium, and keep whisking until ribbons start forming on the surface (often the advice is to look for peaks, but you have to stop whisking to see peaks). Now start adding the sugar (Ingram uses two parts caster sugar to one part eggwhite – so 500 gm sugar in this case). Add the sugar spoon by spoon to ensure it gets well incorporated into the eggwhite.
3 Increase the mixer speed to high. If you do this earlier you risk overaerating the mix, which can cause more cracks “than what’s considered acceptable”, says Ingram. Whip for 5 minutes, then turn off the mixer.
4 Stir in 20 gm cornflour, trickle in 1 tsp (7 ml) of white vinegar and make a couple of turns with a spatula to fold it in.
Have a baking tray lined with silicone (non-stick) baking paper ready so you can shape the pav immediately. If your oven has a fierce fan, dot some meringue underneath the corners of the paper so it’ll stick.

Step 4.
(Photo: Andrew Finlayson)5 Pile the meringue onto the tray, then run a palette knife back and forth over the top to cmpress it into a beehive shape. This compacts the meringue so it won’t stick.
.jpg?resize=877%2C1024)
Step 5.
(Photo: Andrew Finlayson)6 Run the palette knife around the meringue to give it a smooth, round shape, ensuring it has contact with the paper so it has something to spring off, then gently press down from the centre to expand it to 20cm diameter. This will also create a lip around the edge. Accentuate this and smooth the edge again.

Step 6.
(Photo: Andrew Finlayson)7 Transfer tray to a 140°C oven, and immediately turn it down to 100°C. Bake for 1 hour – don’t open it, don’t poke it – then turn off the oven and leave the pavlova to finish cooking as the temperature slowly drops for at least 6 hours or preferably overnight. This gives it time to set and helps form a thick crust.
Seeking more pavlova recipes?
PAVLOVA TOPPINGS
The principles for toppings are straightforward: don’t overpile, and remember you’ll need to cut the pav, so distribute fruit and other toppings evenly. Scissors work well when you have soft toppings such as poached rhubarb.

Ingram uses a mix of mascarpone and single cream for her pavlova topping.
(Photo: Andrew Finlayson)For the cream, Ingram often uses a mix of mascarpone and single cream, but sometimes folds in crème chiboust to enrich it. And while she recommends versions with cherry and chocolate, tropical fruits with coconut, or straight-up berries and cream, the Flour and Stone signature remains fig and honeycomb.


